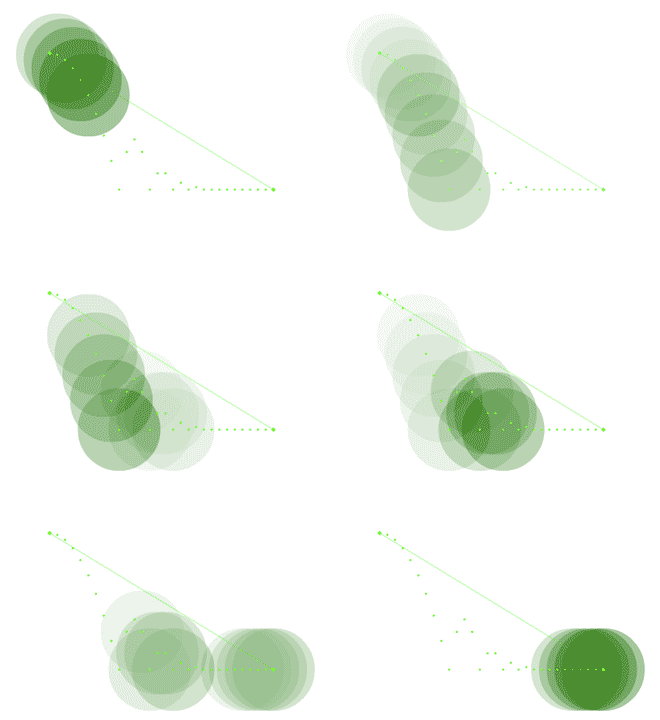
 Now that I've created my Flash animation on the timeline, I realized that I need to edit my animation by shifting the animation's position. The problem here is that when I move the first keyframe, the rest of the animation did not move together. It will be very tedious and time consuming to move the entire key frames manually one by one.
This tutorial will share with you how to move, scale and rotate your entire animation as one object in Adobe Flash (Works on almost all Flash versions).
Step One: Selection
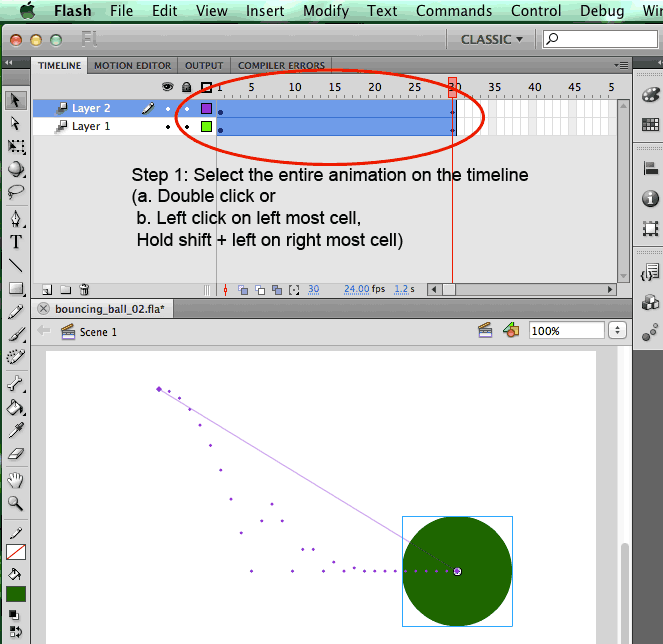
First, select the entire animation on the timeline. If you have multiple layers of animation that should move as one object, select them too. You can do so by Left-clicking the first top left frame, hold down shift, and click on the last frame. When all the cells are highlighted in blue, it means you have selected these cells.
Step Two: Copy Frames
With the cells selected, right click above the selected cells to bring out the options. Click on the Copy frames. You can also press the short cut keys, Command + Alt + C to copy frames. 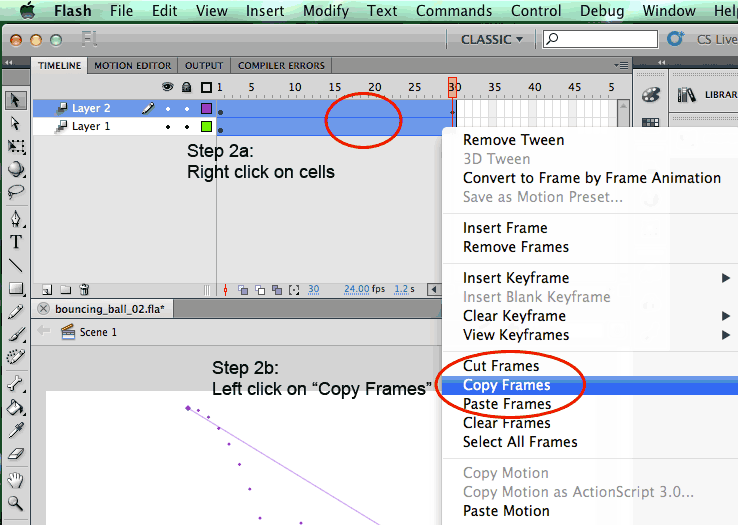
Step Three: Create a new symbol
Create a new empty symbol by clicking on the new symbol icon in library panel's bottom menu. 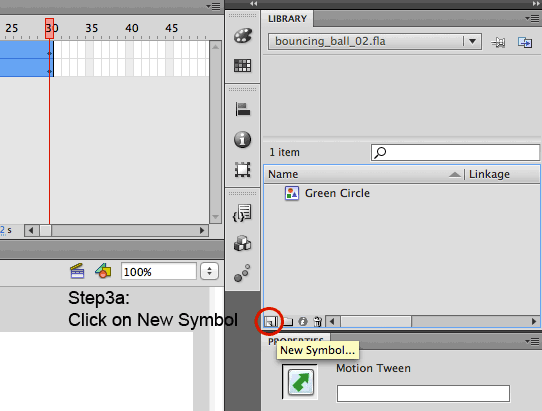
You can choose graphic symbol or movie symbol, depending on the usage of symbols. Give it an appropriate name that your can understand. I normally name it by giving its name, followed by its action, e.g, greenBall_bouncing or rightHand_swing. Noticed that if your object name has two words, the second word's first letter is in capital. This will help you when you are organizing and searching for your animations. 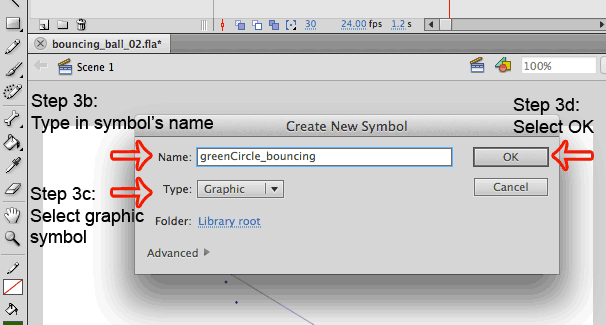
Step Four: Paste animation in symbol.
Double click on your new symbol in your library in order to go into editing mode. Select the first cell, right click on your highlighted cell to bring out the option menu. Click on paste frames, short cut key is Command + Alt + v.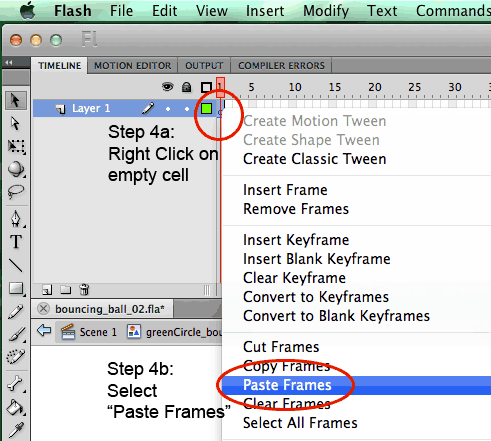
Don't worry if you have previously copied more than one layer, Flash will automatically add in the layers for you. Go ahead and test the animation to see if everything is in place. If something is wrong, repeat from step one to get it right. Once animation is in the symbol, click on Scene1 to go back to the stage.
Step Five: Staging your animation
Create a new empty layer, name the layer according to your object name. Left click on the layer to make sure it is selected. 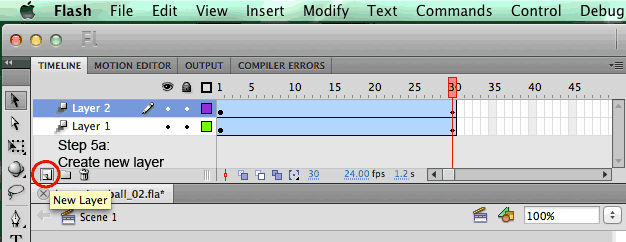 Import your animation symbol from the library to the stage by left click and hold to your symbol, drag to the stage and release. Your symbol will now be on stage.
If you are not seeing any animation, you will need to lengthen your timeline cells as long as the animation runs. 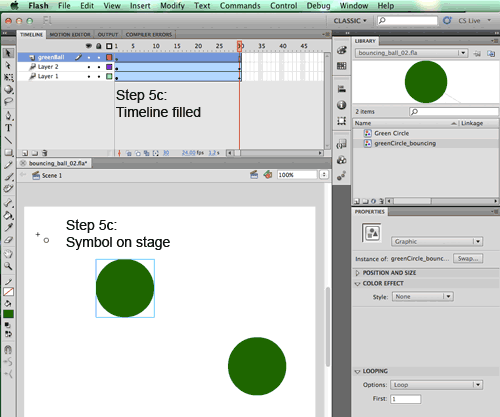
For graphic symbols, you should be able to see the animation on the stage. For movie symbols, you will need to go to Control>Test Movie>Test, or press Command + Enter to publish the animation. 
Step Six: Editing your animation
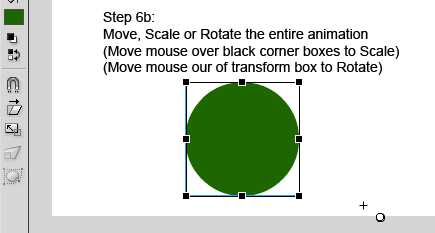
You are now able to move the entire animation on the stage by holding on your left click and dragging it around with our mouse. You are also able to rotate or scale the animation by using the transform tool, short cut key is Q.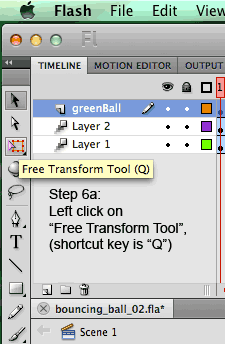
Not only that, you can even animate your animation! Click on the timeline cells of your symbol, right click on it and create motion tween. Go ahead and get crazy with your animation!
Not only it is convenient to store your animation in symbols, it allows you to duplicate your animation very easily! Learning the software is a great start to creating your animation, but make use of your observation skills to improve your animation quality.
Please do drop me a comment if you have problem completing this tutorial!
Please Like and share with your friends!
