
 In this article, I'll talk about the 3 areas that get you started in your walk cycle animation in Maya:
1. Understanding the key to realistic walk cycle animation
2. Preparing a character rig for a 3d walk cycle
3. Blocking a walk cycle animation
It is not easy for beginners to create a walk cycle from scratch. Whether you are learning 3D animation in an animation school or on your own, this article will guide you from the foundation.
Let's dive straight in.
Understand the key to realistic walk cycle 3d animation
Walk cycle is a continuous natural motion of a humanoid trying to make himself fall forward by putting himself off balance. When that happens, he uses one of his leg to catch himself from falling and take a step forward. This actions happen over and over again in our daily life but because it's so natural and happens to us unconsciously, we hardly take notice of it.
As these actions take place, the humanoid is always pivoted on one leg while the other leg is catching the entire body. This results in looping 4 stage of motions:
1. contacting the ground
2. catching the body
3. recover body balance
4. falling forward
5. contacting the ground (repeat 1)
Preparing a character rig for a walk cycle animation
On the 2nd half of the video, I talk about preparing a rig for animation in Maya which will help to make things easier during your animation process. Here is where you can find more details about the Norman rig.
Supposing you are using a practice rig such as Norman rig, it comes with different body parts. In a walk cycle, we do not need to animate the entire body at the same time. Body parts such as upper torso, head and arms that we do not need can be kept hidden while we concentrate on the lower torso.
In the industry, it will be a luxury to have a character that is modelled with various segment. This preparation is more for beginners to get used to animating a segment at a time. Once you are experienced with this animation work flow, you will be able to take up more challenging character animation.
Blocking a walk cycle animation
We create walk cycle starting from lower torso in the following 4 steps:
i. key poses for the 4 stage for left and right leg
ii. timing and speed of entire walk cycle
iii. Easing in and out using inbetweens (video coming soon)
iv. Touch up on minor details such as knees and toes. (video coming soon)
These 4 steps should complete a decent walk cycle for your lower torso. In the following video, I'll talk about how I created the key poses during blocking phase and some of the problems I've come across.
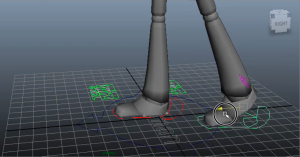
i. Key poses on 4 stage in walk cycle
These are crucial key poses for animators to judge if the walking posture is looking good. This exercise focuses on a beginner walk cycle so we should be aiming at creating an ordinary walk cycle. As you become better at it, you will be adding personalities and style to your walk cycle and using key poses will allow you to judge if the walk cycle look appropriate.
ii. Timing and speed of walk cycle
A normal walk cycle takes approximately 1 second to take 2 steps. Everyone walks at different pace so timing varies. If we are creating an elderly's walk cycle, his speed will be very slow and it will take a longer time to complete 2 steps. The same applies to creating a fast pace office worker's walk cycle. They can be taking 3 to 4 steps within 1 second, thus the timing between each key frame will be very short to create a fast walk cycle animation.
Check out 3D Walk Cycle Animation Class in Maya
Feel free to comment and ask me if you have problem achieving your walk cycle blocking.
Like what you've read? Join other animators who receive exclusive tips on animation by signing up below!