
 Bouncing Ball Tutorial Video With Maya
Bouncing ball is the simplest exercise to start learning animation in 3D. In bouncing ball tutorial video with Maya, I'll be showing you step by step how to create realistic bouncing ball animation using Autodesk Maya. While creating your first bouncing ball, you will also learn the use of Maya's interface such as timeline, navigation panel, tools and many more. You will also learn to apply some principle of animation to create a more realistic ball bouncing.
1. Preparation in Maya
Before learning 3d animation, it is important to know the tools you are using at the back of your hand. There are some critical settings and planning you will need to get ready right at the start of an animation production. These settings should be done right from the start so as to avoid any major, if not detrimental changes once you are in the midst of your production.
What is Frames Per Second (FPS)?
Frame rate should be set right from the start. If you decided to change the frame rate during or after production, this could cause your animation to either drop frame (video will not be smooth) or speed up your animation.
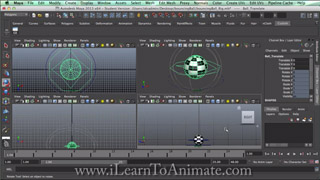
Frame rate can be easily edited by going to the animation settings, which is a white colour icon (right side of auto key icon) at the bottom right hand corner of Maya interface.
Rig Explanation
Majority of the 3d models that are ready to be animated usually comes with an animation rigs. Animation rigs are controllers that helps animators to easily select what they need to animate and assist the animation process by allow certain movements to be conveniently animated.
My practice to using a new animation rig is to experience it. I save as another file for me to play around with the controls. The more I play around with the rig, the better I get in understanding the rig in its boundaries and features. Imagine you get a new character toy, you will like to bend its hands and legs to find out how much it can move.
Bouncing Ball Rig Maya Download
Panel view
It is not easy to understand a virtual object if you are new to virtual environment. What you need is multiple view to help you look at the object from various angles such as front, side and top view. Most of the time, I will make sure I can see these 3 views to make sure my object is moving or rotating the way I want it to be.
Panel views is very good for technical drawing in virtual environment. It provides grids and measurements to make sure your model is created with proper dimension and proportion. For living objects such as humans and animals, make use of perspective view to help you grab a more realistic view of what you are trying to achieve.
Virtual Navigation
Panels help you look at the object from various direction while navigation allows you to move around in the virtual space at your own intuition. You do need to move around in the perspective view to take a closer look at your object.
The 3 most important navigation tools are panning, rotating and zooming. Panning works like a camera where you face your camera in one direction while moving its location. Rotating will rotate your camera view in all direction. Rotating helps you achieve various camera angle such as bird's eye view, down up shot, etc. Zooming allows your camera to zoom in close to whatever part you wish to look closely at. This is particularly useful when you wish to select an object that can be small and hard to spot.
Watch the video for full detail explanation on using Autodesk Maya and its interface. Remember, understanding the tool is the fundamental step to creating quality work.
2. Keyframes for Animation
Keyframes are the critical frames for the software to understand how the animation is going to start and end. With these keyframes, the animation software will be able to create the inbetweens for the animation. It is important to know which pose should be use as the keyframe to avoid confusion in the later part of the animation process. Generally, keyframes are used when object or motion is starting, ending or changing direction.
3. Ease in / Ease out in Animation
Ease in and ease out is also know as slow in and slow out. Ease in is consider as deceleration and ease out is consider as acceleration. Because we live on our precious planet Earth which has gravity, objects are pulled to the ground with a magnetic force. Using ease in and ease out will help to create a realistic motion of an object picking up speed and slowing down. A good example is when a car picks up speed at the green traffic light and slows down its speed as it approaches a red light.
If you want to create realistic and quality animation, here's how!
4. Timing in Animation
Timing is one of the crucial principle in animation that dictates an object to move fast or slow. A bouncing ball with slow timing will be seen as a balloon and a fast moving timing will look like a bowling ball. It is important to thoroughly understand the use of timing as this is what differentiates a good against a bad animation. Timing is also affected by FPS, always note the FPS of your animation before starting a project.
5. Graph Editor in Maya
Graph editor allows animator to view the objects motion accurately against time. This is very close to what we did in our science laboratory where we plot a graph of time vs distance traveled. Graph editor also helps to reduce the use of unnecessary key frames which could cause jerking of animation.
6. Play Blast Animation in Maya
Previewing animation in Maya is may not be as accurate as watching the animation in video because the real time play back might become slow if animation is complex. Using play blast function in Maya allows you to watch your animation in video and it will give you a feel of how your animation will look like eventually.
7. Horizontal Bouncing Ball Movement
Horizontal movement of the bouncing ball is created by moving the bouncing ball across either X or Z axis. I'll be explaining in details how to create this movement with the help of graph editor editing.
8. Realistic Bouncing Ball Rotation
This video will talk about how I edit rotation to my bouncing ball and make it look realistic. Graph editor is also used to fine tune the ball's rotation. Learn to make use of the control handles in the graph editor to create a smoother curve for animation.
How exactly does a realistic movement looks like?
Now that you have learnt all the tools needed to create a bouncing ball, it is time for you to try create a realistic bouncing ball yourself! Take a look at a real ball bouncing.
When we create animation, we always start by observing a real footage so that we know how it looks like. Now that you have watched a real bouncing ball in action, try to create an animation as close to this footage as possible.
Thank you for watching! If you like what I've shared, do share it with your friends too! And feel free to leave me a comment if you have any questions. I'll be glad to answer them!
At video 3 of 8 where you explained ease in and
ease out, at time
4minute 31 seconds . you brought out the graph
editor. the problem I
have is that the curve on my graph editor is a
straight line not a
curve like yours. therefore I can’t work further. I
guess its because
I didn’t create the rigs around my ball. I don’t
know how to create
the translational and rotational rigs. thank you sir.
Hi Tunde, let me help you continue your animation.
1. You can download my bouncing ball rig using this link: http://ilearntoanimate.com/wp-content/uploads/2015/01/bouncingBall_Rig.mb_.zip
2. It is common to have graph editor that is not curve, i.e. linear tangent. All you need to do is:
i. Select all the keyframe in your graph editor using Left Mouse Click and Drag a marquee selection, OR, Left Mouse Click on the keyframe and hold down SHIFT and continue to select other keyframes.
ii. Once selection is done, look for a button that says "Flat Tangents" and click it. This button is located at the top of your graph editor panel, about 16th icon from the left. You can also find the same function by going to the Menu in graph editor window -> Tangents -> Flat. By clicking on this button, your graph should become curved.
Let me know if this works for you
its a new month here in Nigeria, so I’m wishing u a happy new month. my problem is not fixed yet and the rig I downloaded is not displaying. I am beginning to think that it is because of the version of Maya that I am using. I am using Maya 2010. can u please kindly share a link where I can download a latest version because I have tried getting it my self. thanks
hello Mr Nash Lin. I have gotten it. my graph editor is now working perfectly. thanks
Hi Tunde! Thank you very much for your new year greetings! I wish you a happy new year too!
I’m very glad that it’s working for you now! So is it because of the software version? Do ask me again when you meet any problem!
Hi there, please how’d you do it?
and the rig doesn’t open on my Maya version; maya 2012
Hi Jesse, you will need to download Maya 2013 or later version to use this rig. If you have a educational email account (e.g. xxx@xxx.edu), you can download a student version at Autodesk Educational Institutions.
If you are still unable to find a later version, you can actually still continue with this animation tutorial, except the graph editor will all be using on the ball. Let me know if you need more help.